

GETTING STARTED
Building models made from resin isn't too much different than building any other model kit...the parts get glued together, you paint, you're done. Simple! However, the techniques that are used in building a model made of resin are a bit different than for assembly a normal styrene kit.
Before starting on your resin kit, it is a good idea to rinse all the parts in a mild detergent to remove the mold release left on the parts from the casting process. Products like "Formula 409" and "Fantastic" are good for this. Spray the parts with the cleaner and then rinse in cool water and let dry. Doing this will help the glue and paint stick better.
PREPARING PARTS
You will notice that there are two kinds of manufacturing artifacts associated with resin parts that need to be removed from parts before building your model: Sprues and Pour Plugs. Sprues and Plugs are blocks of resin that allow the resin to be poured into the mold during casting. Sprues tend to be attached to smaller parts, sometimes creating a "tree" of parts. Sprue is usually a completely separate piece of resin from which the parts are removed. The Plugs are on larger parts and tend to be extensions of the finished part, they need to be cut or sanded off.

Plugs usually must be cut or sanded off in order to assemble you kit. In some cases, the plug will fit in to a tube (like for a rocket body tube) and no removal will be necessary. "Dry fitting" before assembly will help you see which parts need the pour plugs removed and which don't. If you have a power sander or a motor tool (like a Dremel), they will do a great job of removing the excess resin on your parts.
If you don't have a power sander, you can use a sanding block with a course sandpaper (80 grit or so) to remove the plug. Smaller parts can be removed with an x-Acto type of hobby knife. Go slow, Resin is very soft and will disappear quickly during cutting or sanding and you can easily take off too much. Razor saws (found at better hobby stores) also work well on removing some kinds of plugs. You will notice that plugs will be indented from the edge. This is so you have a reference to judge where the plug ends and the glue joint begins, so you will know when to stop sanding.

IMPORTANT: Whenever you sand resin parts be sure to wear a FILTER MASK, the resin dust, while not toxic, is not good to breathe. Using a mask, sanding outside and wet sanding are all good ideas when removing the Plugs from your parts. It is also a good idea to always WEAR EYE PROTECTION when cutting or sanding any model parts. I like to keep a vacuum hose going nearby when sanding resin.
GLUING THE MODEL TOGETHER

Cyanoacrylate or "super glue" is the best adhesive for assembling resin kits. Follow the instructions as to where parts go. Precautions should be used so as not to over-do the amount of super glue needed to attach a part. Usually a couple of drops or a very small bead of glue is all that is needed. If you use too much, glue will ooze out from the two parts being assembled and you can easily glue your fingers to the model! Accelerators for super glues are available and will aid in setting the glue in place. When using the accelerator, don't use the sprayer that usually comes with the bottle. A very small amount is all that is needed.
A ruling pen (available in drafting supply stores) works great for applying the accelerator.

PHOTOETCHED BRASS PARTS
In order to create the finest degree of detail on RealSpace models, some of the kits include parts made of photoetched brass. Not every kit has these parts, but if the kit you purchased has them some special handling and precautions need to be followed. Some of the photoetched parts or the surrounding brass may be sharp. Use extreme caution and WEAR EYE PROTECTION when handling metal parts and ALWAYS KEEP SMALL PARTS OUT OF THE HANDS OF CHILDREN. To cut the parts from the surrounding metal it is best to use an x-Acto type of hobby knife and cut on a hard surface. I also recommend the Xuron Micro Shear (available from Micro Mark #81308 or 1-800-225-1066) which is specially designed to cut photoetch. Be sure to secure the part being cut to keep it from flying across the room when cut. Some parts require folding or bending to form the metal in to the correct shape. This is best accomplished with a needle nosed pliers. Work slow and don't try to bend it all at the same time. There is some give to the metal and it can be bent a few times before it will break. Several small bends is better than one large bend. For parts that need to be rolled into a circle, use a dowel rod to press the part out into it's correct shape. For longer parts that need folding, a metal straightedge can be employed to bend the part all at once. A triangular file has also been used by one RealSpace customer with good results. Photoetched parts can be glued with super glue and painted with the same type paint you use on the rest of the model.
VACUUM-FORMED PARTS

Some parts for RealSpace kits are vacuum-formed from styrene. These parts are shipped still attached to the surrounding sheet from which it was formed. Most parts will have a definitive line between the edge of the part and the surrounding plastic. To remove the part from the surrounding plastic, use a new #11 blade and gently score the plastic along the edge line. Then carefully bend along the score and the plastic will separate along the score. Depending on how well you scored the plastic, some edge sanding may be required, but in most cases the edge will have a finished appearance. gluing a vacuformed part to resin you will need to use super glue. If the vac part is to be glued to another vac part (like on the Viking aeroshell parts) either super glue or regular styrene cement can be used.
PAINTING AND FINISHING
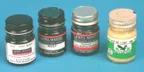
Painting instructions are included in the instructions. Any type of model hobby paint can be used on the resin and metal parts. A primer coat is a good idea for the larger parts. An airbrush is recommended to produce a clean, smooth finish, but isn't required. Canned spray paint may be used, although the control isn't as good as when using an airbrush.
Many spacecraft subjects have natural metal finishes which can be tricky to simulate on a model. There are two very good products we recommend to accomplish this result:
BARE-METAL FOIL - Is an extremely thin, adhesive backed real metal foil. It comes in many styles including Ultra Chrome, Chrome, Matte Aluminum and Black Chrome. Handling the foil takes some practice, due to it’s very thin nature, but once you get used to it applying it is easy. The different styles of foil can be combined on a model for a very realistic effect. Some modelers like to use the Black Chrome foil for roll markings on models.
ALCLAD II Lacquer - For modelers skilled with an airbrush, Alclad II is an amazing paint product that can produce nearly mirror chrome finishes as well as a wide variety of metal shades on models. For best results using this product, follow the instructions provided with the paint. A primer coat is recommended, although I have had good results both with and without a primer. Some testing by the modeler is suggested until the desired effect is acheived. Alclad II is a very tough finish and resists pealing and fingerprints.
If you have any questions regarding assembly or painting of RealSpace Models or are interested in our entire line of resin models you canuse our CONTACT US section to send a note and I'll try to answer any further questions you may have.